Brewiks Manual
Software
Start Screen
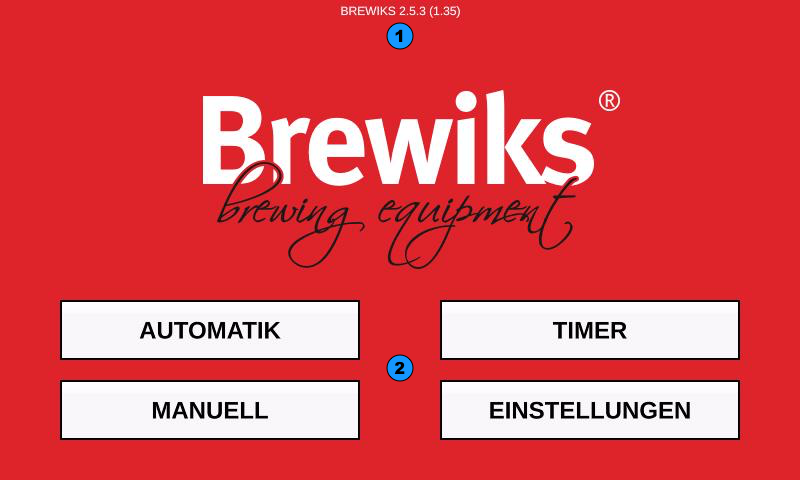
After starting the system, the following welcome screen appears.
1) At the top center, the current software version is printed. In brackets is the firmware version of the touch panel. This information is important for any support inquiries regarding the software.
2) Using the four large buttons, you can quickly navigate to the individual modes (Automatic, Manual, and Timer), as well as access the Settings.
General UI (User Interface) Elements
Here are some UI elements briefly explained that are seen on various screens:
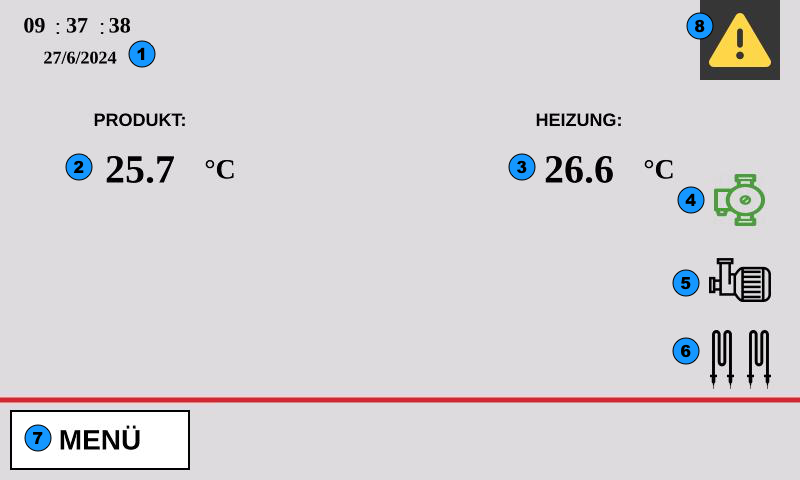
1) Current date and time
2) Product temperature (content wort pan)
3) Temperature of the heating medium
4) Status of the heating pump (recirculation pump) - Only for Brewiks 300/500
5) Status (ON / OFF) of the mash / wort pump
6) Status of the heating elements (Orange = ON)
7) By selecting "MENU" you leave the current mode and can return to the home screen at any time.
8) If a warning or error occurs, a warning symbol will flash in the top right. By clicking on it, you can access the "Alarm Overview" and get a more detailed error description.
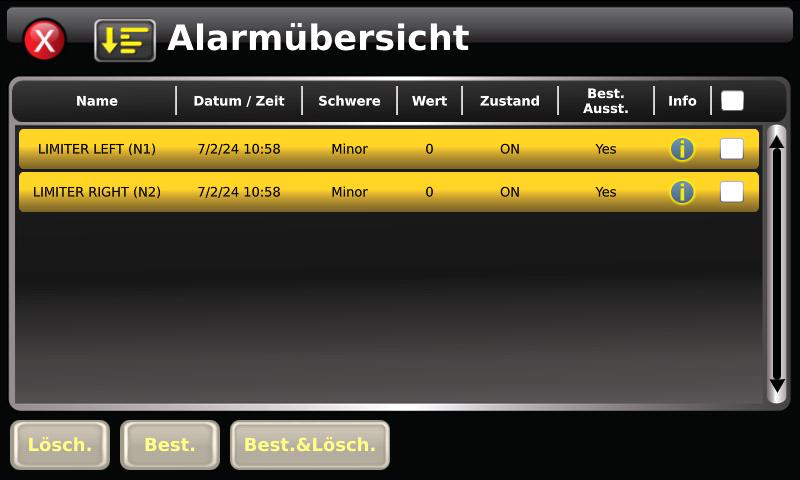
Alarm overview
Manual mode
The manual mode allows the system to be operated manually and offers maximum flexibility.
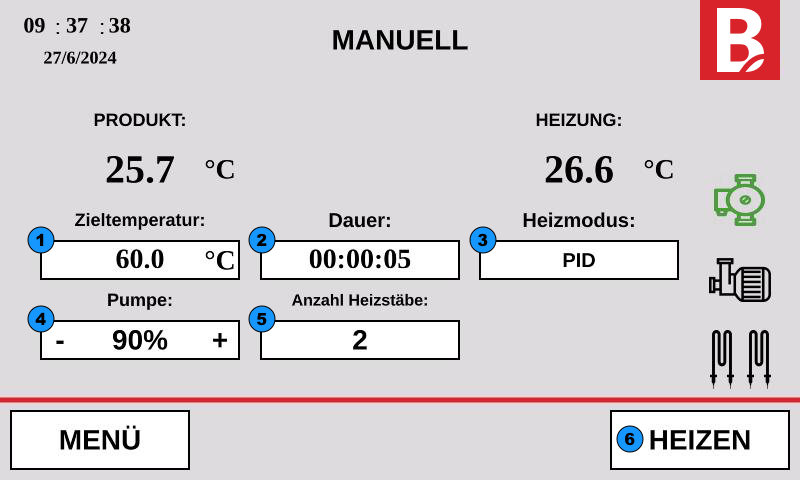
1) Target temperature:
Here the desired target temperature is set. Once the target temperature is reached, a timer starts while the temperature is maintained at the desired level. An acoustic signal sounds after the timer expires.
2) Duration:
Here the duration of the timer, which runs after reaching the target temperature, is set.
3) Heating mode:
Here various heating modes can be selected:
- PID
- Direct
- Boil
4) Pump:
With the + and - buttons, the desired pump speed can be controlled. The available speeds can be defined in the Settings.
5) Number of heating elements:
Here you can select whether the heater should work with one or both heating elements.
6) Heating:
With the "Heating" button, the heater can be turned ON (green) or OFF.
Timer Function
With the timer function, the water can be heated to the desired temperature overnight, so you can start mashing in as soon as you arrive at the brewery.
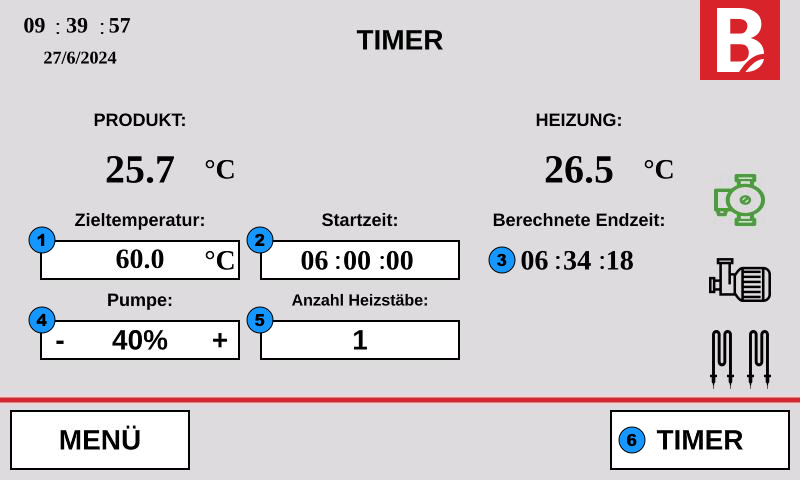
1) Target temperature:
This is where the desired target temperature is set. Once the target temperature is reached, it will be maintained until the timer mode is ended.
2) Start time:
The time on the next day when the heating process should start.
3) Estimated end time:
The expected time when the desired target temperature will be reached.
4) Pump:
Use the + and - buttons to preset the desired pump speed. Available speeds can be defined in the Settings.
5) Number of heating elements:
Here you can select whether the heater should operate with one or both heating elements.
6) Timer:
Use this button to activate (green) or deactivate the "Timer."
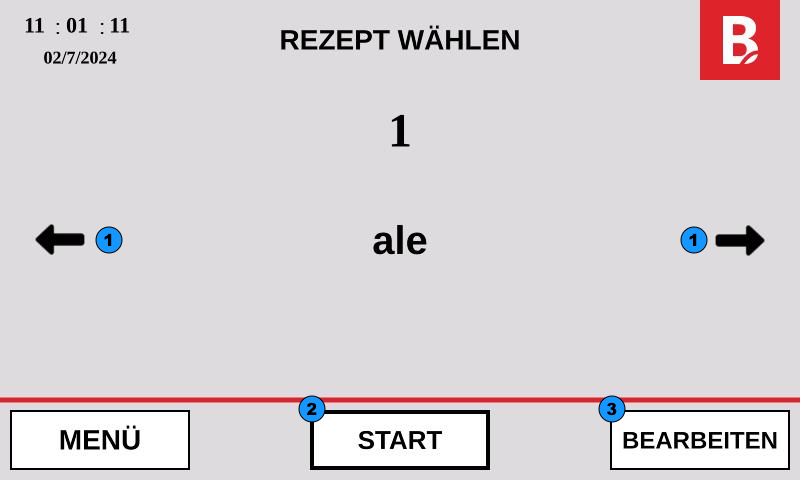
Automatic Mode
Through this screen, the desired recipe can be selected (1), started (2), or edited (3). Up to 20 recipes can be managed.
Settings
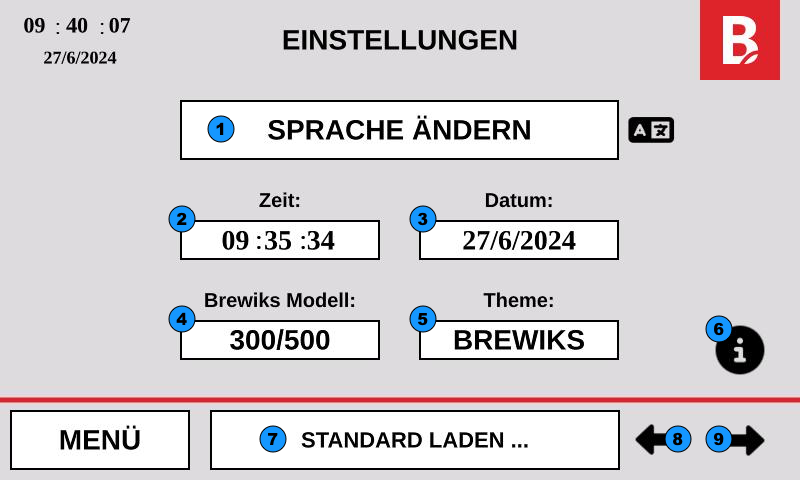
1) Change language:
Here you can change the language of the touch interface. Currently, you can choose between German, English, and French.
2) Time:
Here you can set the current time.
3) Date:
Here you can set the current date.
4) Brewiks model:
If you are using a Brewiks 200 with thermo-oil heating, it should say "200" here. Otherwise, "300/500"
5) Theme:
Here you select the color scheme of the interface: Brewiks (red) or EDS (blue)
6) Info:
Here you can access the info screen. Here you will find statistics on the operating hours and switching cycles of the heating elements and pumps. If components need to be replaced, you can also reset the counters here.
7) Load standard:
This is where you load the standard settings for the selected Brewiks model.
8 / 9) Navigation arrows:
The navigation arrows can be used to switch between the additional setting pages forward and backward.
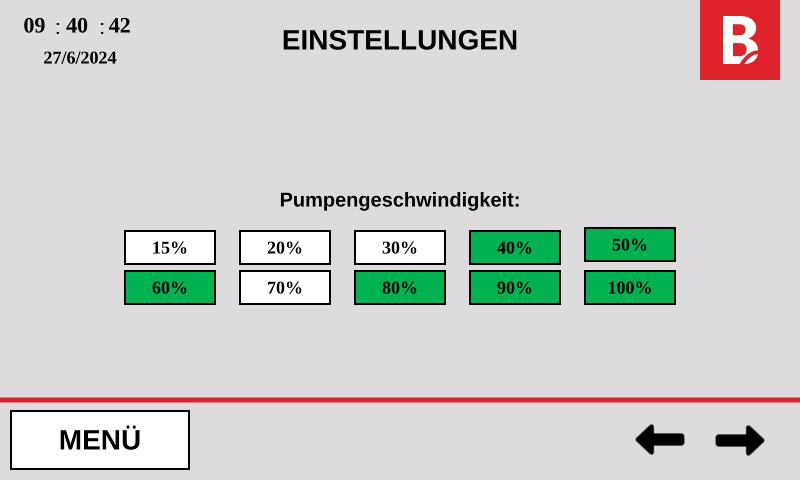
Settings - Pump speed
Select here all pump speeds that should be available in the quick selection for controlling the pump speed. (ON = green)
Settings - General
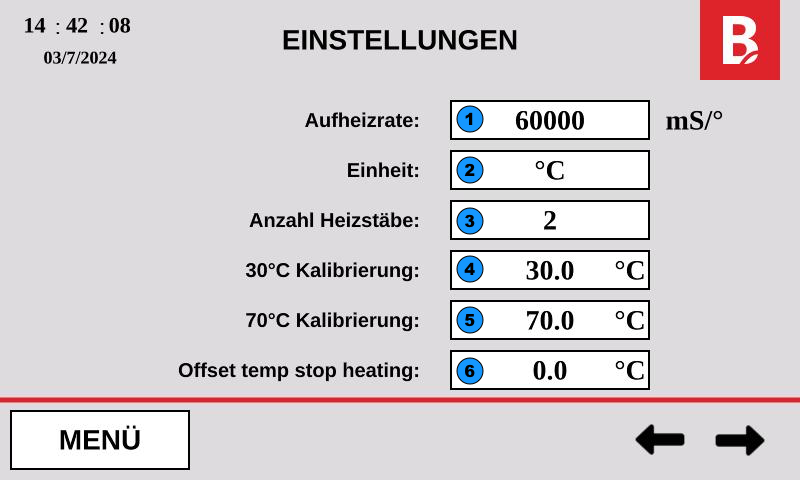
1) Heating rate:
Here the heating rate can be specified in mS (milliseconds) per degree. This value is used to calculate the expected end times.
2) Unit:
You can choose between °C (Celsius) and °F (Fahrenheit).
3) Number of heating elements:
If there is not enough electrical power available for both heating elements, you can define here that generally only one heating element should be used.
4) 30° Calibration:
Here the actually measured value is entered when the controller displays 30°.
5) 70° Calibration:
Here the actually measured value is entered when the controller displays 70°.
6) Offset temp stop heating (Brewiks 200 only):
The PID heating mode is only valid for B300 and B500 models. For thermodynamic reasons, this offset is used for B200. The heater will switch off when this hysteresis is reached before the target temperature is reached.
Settings - PID / Direct
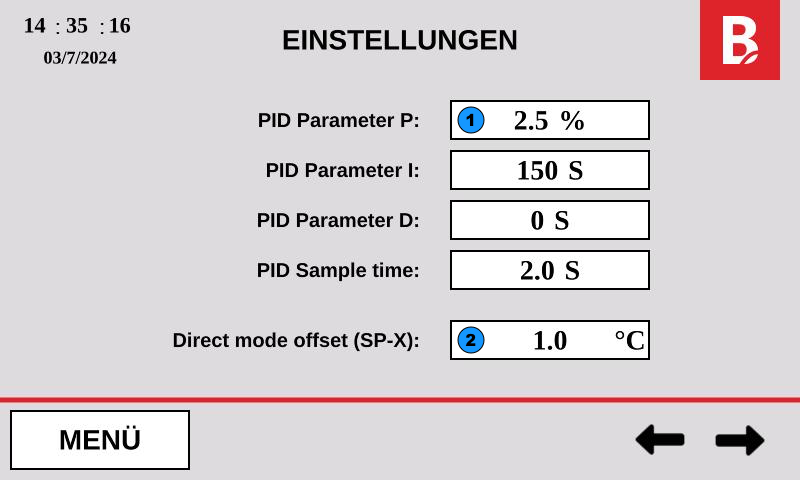
1) PID:
The PID controller ensures that the target temperature in the mash tun / wort kettle is reached or kept constant as accurately as possible by controlling the heating elements on/off. It uses proportional, integral, and derivative components to quickly and accurately correct deviations from the target temperature and ensure stable temperature conditions.
The P-parameter (proportional component) determines the controller's response to the current deviation from the setpoint. It ensures that the controlled variable is adjusted proportionally to the magnitude of the deviation, with a larger deviation causing a stronger correction.
The I-parameter (integral component) considers the sum of past deviations over time. It ensures that even small but constant deviations are compensated for by gradually adjusting the controlled variable to reach the setpoint in the long term and eliminate persistent control deviations.
The D-parameter (derivative component) responds to the rate of change of the deviation from the setpoint. It ensures that the controlled variable is adjusted based on the speed and direction of the deviation change, helping to reduce overshoot and stabilize the system faster.
2) Direct mode offset:
In direct heating mode, it causes the heater to turn off when:
Setpoint == Setpoint - Offset
Preventing an "overheating" of the set temperature.
Settings - Temperatures
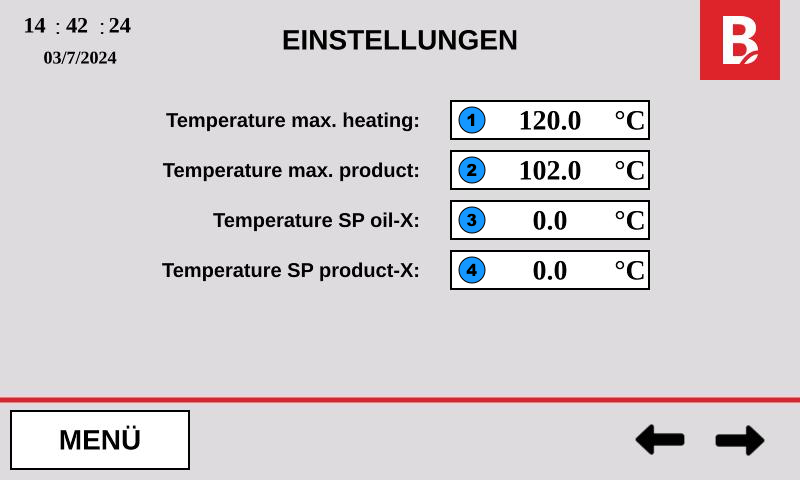
1) max heating:
Maximum allowable temperature of the heating jacket.
When this temperature is reached, the heating is switched off for safety reasons regardless of the setpoint.
2) max product:
Maximum allowable temperature of the product. An alarm is generated when this temperature is reached.
3) SP oil-X (Brewiks 200 only):
4) SP product-X (Brewiks 200 only):
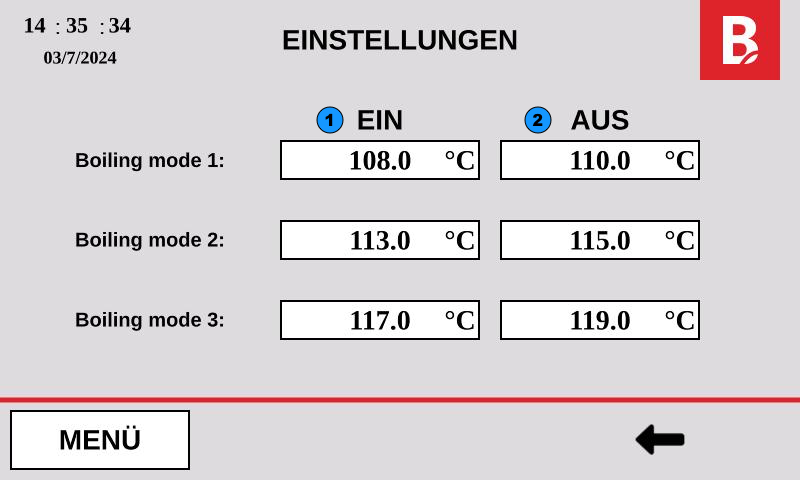
Settings - Heating mode COOKING
In the heating mode "BOILING" there are three intensity levels (Boiling mode 1 - 3).
If the temperature of the heating medium falls below the value "(1) ON", the heater turns on and remains on until the temperature reaches the value "(2) OFF".
Depending on the recipe, fill level, amount of hops, or installation height of the system (height above sea level), the optimal on and off temperatures of the heating jacket can be set here.
The temperatures refer to the heating jacket and not to the product!